
Welcome to my guide to Motorhome Internet Access! I use my motor home to head for the mountains to walk/ski/cycle and I am a bit of a geek. Now, this is 2017, and a geek without an internet connection is just a wannabe geek, and the mountains can be a challenging place to obtain that internet connection. This article details the three methods I use for motorhome internet access presented in order of use:
- 3G/4G MiFi with external antenna
- WiFi Repeater with external antenna
- A 2-way Ku Band Satellite Internet System on a tripod
Additionally, I will cover:
This information is provided as-is. I make no guarantees as to its suitability for your application or accuracy. If in doubt about anything go find yourself an auto-electrician. If you foul anything up, its your fault, not mine! Ensuring that any antennas that you fit to your van whether stationary or moving are SAFE is also your responsibility!
Where I suggest hardware, it might not be exactly what I use – technology changes and better options are now available. The antenna(s) you use will depend on your van, and whether you want them permanently mounted. Mine is a panel van conversion (PVC), and the 3G/4G/WiFi antennas are permanently mounted.
Now, I am aware that some folks will baulk at the thought of spending over £250 on a MiFi (Mobile WiFi) or WiFi Repeater system, so I shall also be highlighting the budget options. By way of a price-guide, the minimum you can expect to pay is shown below. NB: these are realistic figures – yes, you can go cheaper, but i’m assuming that you do actually want this to work!
- Permanently mounted MiFi install from £160 (ongoing costs eg data are extra!)
- Permanently mounted WiFi Repeater (booster) install from £130
- Temporarily mounted WiFi Repeater (booster) install from £85
– See ‘Options’ in each section.
Read on to find out which of these will suit you best!
Motorhome Internet via 3G/4G MiFi
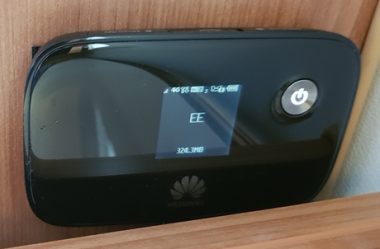
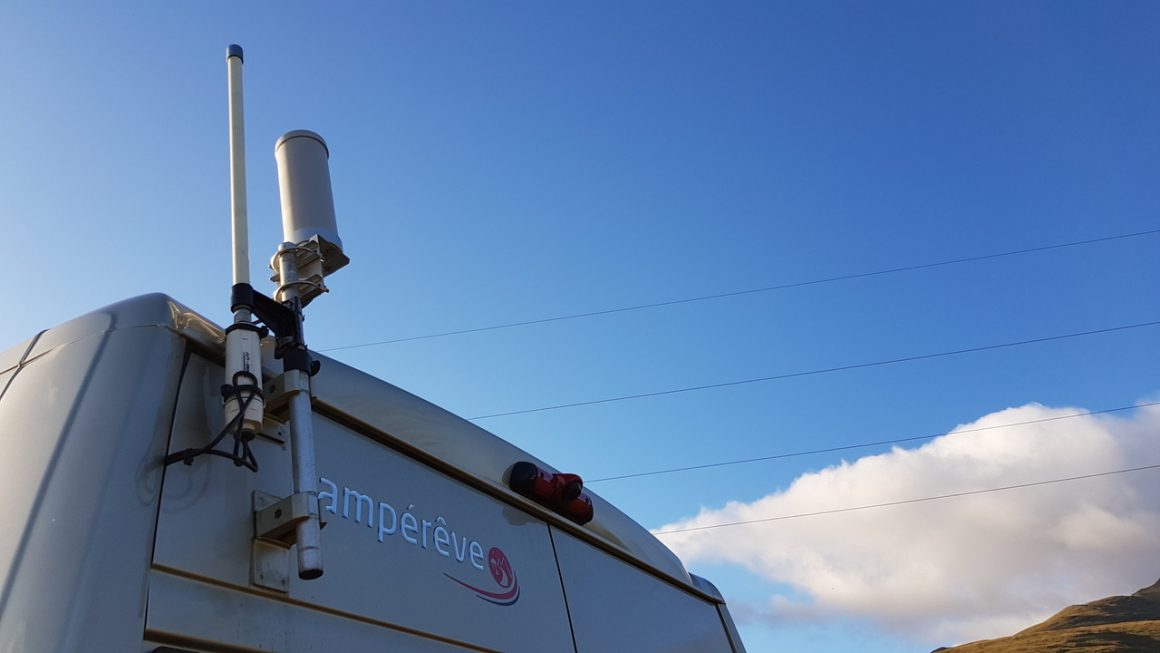
This is my most used method for getting internet access. The external antenna connects via a short length of cable to a Huawei E5776s-32 MiFi. My MiFi device has a single antenna connection. The external antenna is essential, without it, a MiFi will give you zero gain over simply sharing your internet connection from a mobile phone.
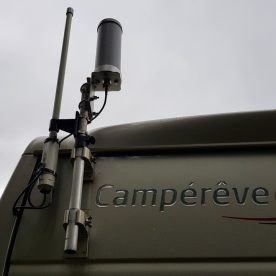
My antenna, from Solwise, is permanently fitted to the rear doors of the van. This increases the versatility of the MiFi system as its always ready to go, and may be used by passengers while on the move. Generally the taller the antenna, the better it will work, but obviously there are limits!
The external antenna has an N-Type connector. Huawei MiFi devices have a TS9 connector(s). Unfortunately, its not possible (due to the massive difference in the size of the connectors) to buy a cable with an N-Type on one end and a TS9 on the other. One must buy an N-Type –> SMA cable of a suitable length to reach the MiFi, and also a ‘pigtail’ (a short cable with an SMA on one end and a TS9 on the other). Suitable cables are in the kit list links later.
Your MiFi will likely be more modern than mine – the Huawei E5577 for instance. This has 2 antenna connections and will require 2 antenna cables and either 2 antenna’s or a single antenna with two connectors on it.
Choosing a Sim Card
EE has the best 3G and 4G coverage UK wide, and as my phone provider is also EE they were an easy choice. If you already have an EE contract, you can add a shared sim to this contract to share the data. It used to be possible to get a data-only sim for an extra £7/Month, unfortunately, this was discontinued and its now only possible to get a combined phone and data sim card for an additional £13/Month. Its worth phoning EE up rather than doing this online – I got a cracking deal sim-free: 15GB/month data unlimited mins/texts and three sim cards (one for phone, one for tablet and one for MiFi) for £35/month after discounts.
I am away in my van a good 80 nights a year, less demanding users may find that a no-contract, pre-loaded 6 or 12 month Sim card better suits their needs:
Its well worth shopping around for the above. The mobile networks own stores are usually NOT the cheapest place to get these SIM’s from, and the offers and deals change regularly. You should be able to get what you require from either Amazon, eBay or MobiMemory. Read the details carefully – depending on the SIM card, the data will expire after 30 days, 6 months or 12 months.
I’ve not considered O2 or Vodafone as their 3G/4G coverage in the area’s I visit is awful. Vodafone might still have the best 2G network, but this is useless for the internet.
Typical Speeds
- With a 3G signal, I can see speeds from 1Mbit to 5Mbits downstream, and about half this range upstream
- With a 4G signal, speeds range from 5Mbits to 30Mbits, and are often around the same upstream (using my older E5776 MiFi)
- With a newer Huawei E5577 and a dual external antenna setup, speeds can reach 100Mbits in 4G in ideal conditions.
With EE and Three, 3G operates at 2100MHz, 4G operates at 800, 1800 and 2600MHz. The lower the frequency, the lower the overall capacity, but better the signal propagation (and building penetration); as such its common to see 2600MHz and 1800MHz spectrum deployed in more urban area’s while 800MHz spectrum is used to cover vast swathes of open countryside from limited cell sites. Its worth noting that EE started providing 4G almost a year before the competition using 1800MHz frequencies previously used for 2G services. This gave them a head-start which they still maintain. The 4 frequencies in use place demands on your chosen antenna which should also cover all frequencies while maintaining useful gain. More on bands here. From 2020, 700MHz spectrum will be added to the mix as the digital-switch over for TV has made this available. As usual, this new spectrum will be fought over by the mobile networks in an auction. 700MHz spectrum is better still than 800MHz at covering large area’s from a single cell tower – great for motor-homers!
Use Abroad
Since the 15th June 2017, all EU/EEA mobile providers have been required to offer EU roaming for data, calls and texts at the same rate as is paid at home. Three has been offering this for some time already with their ‘feel at home’ system, but they have now lost (most) of their USP.
The rules for EU roaming charges also affect the three non-EU, countries of Norway, Liechtenstein and Iceland since these are within the EEA. The odd-man-out in Europe is Switzerland where full old-school roaming charges may technically still be charged. In the case of EE and Three, this wont happen as separate deals have ensured reciprocal free roaming with Switzerland.
Three’s ‘Feel At Home’ system has always (and continues to) included several non EU countries, while on EE, the ‘Max’ plan adds Australia, Canada, Mexico, New Zealand and the USA.
The current list of countries where you can roam for free is available via these links: EE | Three
There are some restrictions on the use of your UK data while abroad, but these are unlikely to effect the vast majority of Motorhomers, and are designed to protect networks from miss-use and over-use of the new system. Its also important for some offerings that the SIM card is used in the UK at least once beforehand.
Shopping List
- Huawei E5577s [-321 version NOT -603 Version] (Amazon) £70 – Cat4 up to 150MBits download and 50Mbits upload or… *
- Huawei E5787 (Amazon) £180 – Cat6 up to 300Mbits download and 100Mbits upload (on 4G+ networks) **
- Mounting pod and power supply (Motorhome WiFi) (£40)
- Cheaper, less neat option vs the above 2 x Pigtail (£4.44) | Power Supply (£8.99) | Velcro Mounting Pads (£2.54) – Total £15.97
- 2-off 1-metre/2-metre N-Type Male to SMA Male (1 Metre | 2 Metre) £4.82
- Fuse 3A either Inline or Fixed – For 4G + WiFi solution the fixed auxiliary fusebox is neater.
* Some eBay/Amazon sellers are supplying a NON-UK version of the Huawei E5577. Please be sure to buy the Huawei E5577s-321 and NOT the E5577s-603. The latter lacks support for some UK 3G & 4G frequencies! The Amazon link to the item above is the UK version. Thanks to ‘Steve’ on the MMM Motorhome forums for pointing this out!
** The new Huawei E5787 is currently madly expensive at £180 – but it will come down in price. It offers twice the speeds of the E5577 but there is only a benefit on 4G+ networks and these are currently only available in towns and cities. At the moment, its best to just buy the E5577-321 instead.
3G/4G Antenna Options Shown Listed By Expected Performance (Best First) **
- Option 1: 2-off (for Huawei E5577) Amazon | Solwise [This is what I use] £71 ea
- Option 2: 1-off (for Huawei E5577) Solwise £108 (poss too tall for permanent mounting)
- Option 3: 2-off (for Huawei E5577) Amazon £22
- Option 4: 1-off (for Huawei E5577) Amazon £65 or Amazon £56 (roof mount, too fat for pole mount)
- Option 5: Magnetic Mount 2-off (for Huawei E5577) Solwise £113ea (temporary mounting)
- Option 6: 1-off PUK Antenna: Amazon-1 | Amazon-2 | Motorhome WiFi | Solwise-1 | Solwise-2 | Solwise-3 | Aquamare (£37-£222)
There is no huge value in a directional antenna for 3G/4G (especially if it is permanently mounted) – it will just be a pain to setup each time. What you choose will depend on how you can mount it, and whether it is to be permanently installed. I have given some idea’s re mounting options towards the end of this blog.
For Option 6 (The PUK Antenna option), connections for both 3G/4G and WiFi can be provided by a single antenna (Solwise-3 and Acquamare). Performance will be poor compared to options 1-5, but still far better than a mobile phone used within the van. Note also that Motorhome WiFi sells a mount for their 3G/4G PUK antenna which enables easy fitting on the ribbed roof of a PVC.
**My ordering of the above is based on my experience as an electronics engineer. I have not tried all the antenna’s out, but I do have experience of the various types of antenna’s available.
Why Two Antenna Connections?
All the Huawei devices I have mentioned above are ‘2×2 MIMO devices’ (multiple-in, multiple-out). This means that they establish 2 connections with the base station in each direction, and split the data transferred between the established links. The older E5776s-32 (like I have) only has a single external antenna connection (the other antenna is internal). As such where there is zero signal within the van, and only one external antenna, the device ceases to be ‘MiMo’ and reverts to 1×1 operation. Connecting only one of the external antenna connections on a E5577 will also force it into ‘1×1’ rather than ‘2×2’ operation. This will more than halve the speeds, but they will still be of the order of 20Mbits. You might choose this option to reduce the need for 2 antenna’s on your van. (Note: All my antenna suggestions based on full MiMo 2×2 operation).
Options
- [1] Budget On-Roof Install: Huawei E5577 £70 | 2 x Pigtail (£4.44) | Power Supply (£9) | Velcro Mounting Pads £2.54 | 2x Antenna Cables £10 | Antenna £56 | Through Roof Gland £12 Total: £164
- [2] Budget On-Pole Install: Huawei E5577 £70 | 2 x Pigtail (£4.44) | Power Supply (£9) | Velcro Mounting Pads £2.54 | 2x Antenna Cables £10 | 2 x Antenna £44 | Pole Clips £11 | Mast £9 Total: £160
- [3] Ultimate On-Roof Install: Huawei E5577 £70 | Quick-Mount £40 | 2x Antenna Cables £10 | 2x Antenna £142 | Through Roof Gland £12 Total: £274
- [4] Ultimate On-Pole Install: Huawei E5577 £70 | Quick-Mount £40 | 2x Antenna Cables £10 | 2x Antenna £142 | | Pole Clips £11 | Mast £9 Total: £282
Wiring It Up
Largely, how you wire this up will depend on the parts you selected and your vehicle. Whatever you do, ensure that the 12V feed into the either the Motorhome WiFi Mounting Pod or the Amazon Power Supply is fused on the 12V side using a 1A fuse. The antenna cable(s) are easily routed through the seal of the back door on a PVC, through a window for a temporary install, or via a drilled hole and sealed cable gland for a permanent install on either a PVC or Coachbuilt. Suitable cable glands may be found here: Single Gland | Double Gland. Remember that for best results you need the antenna cable to be as short as possible.
One-Time Setup
There are some once-off setup tasks for your MiFi, shown below (best done on a laptop). See screenshots in the links. Note: This is from my E5776 MiFi, details for the E5577 will differ, but the following should serve as a general guide.
- Insert the SIM card – it slots into the side under the flap, if you have put it in the right way then it will click in (like a retractable nib pen!)
- Connect to the the MiFi’s WiFi signal (the network name and password are on a sticker under the device
- Enter the IP address of the MiFi (http://192.168.1.1 or http://192.168.0.1 or http://192.168.8.1) See sticker
- Login using the default username and password ‘admin’ and ‘admin’ You should see the Home Screen
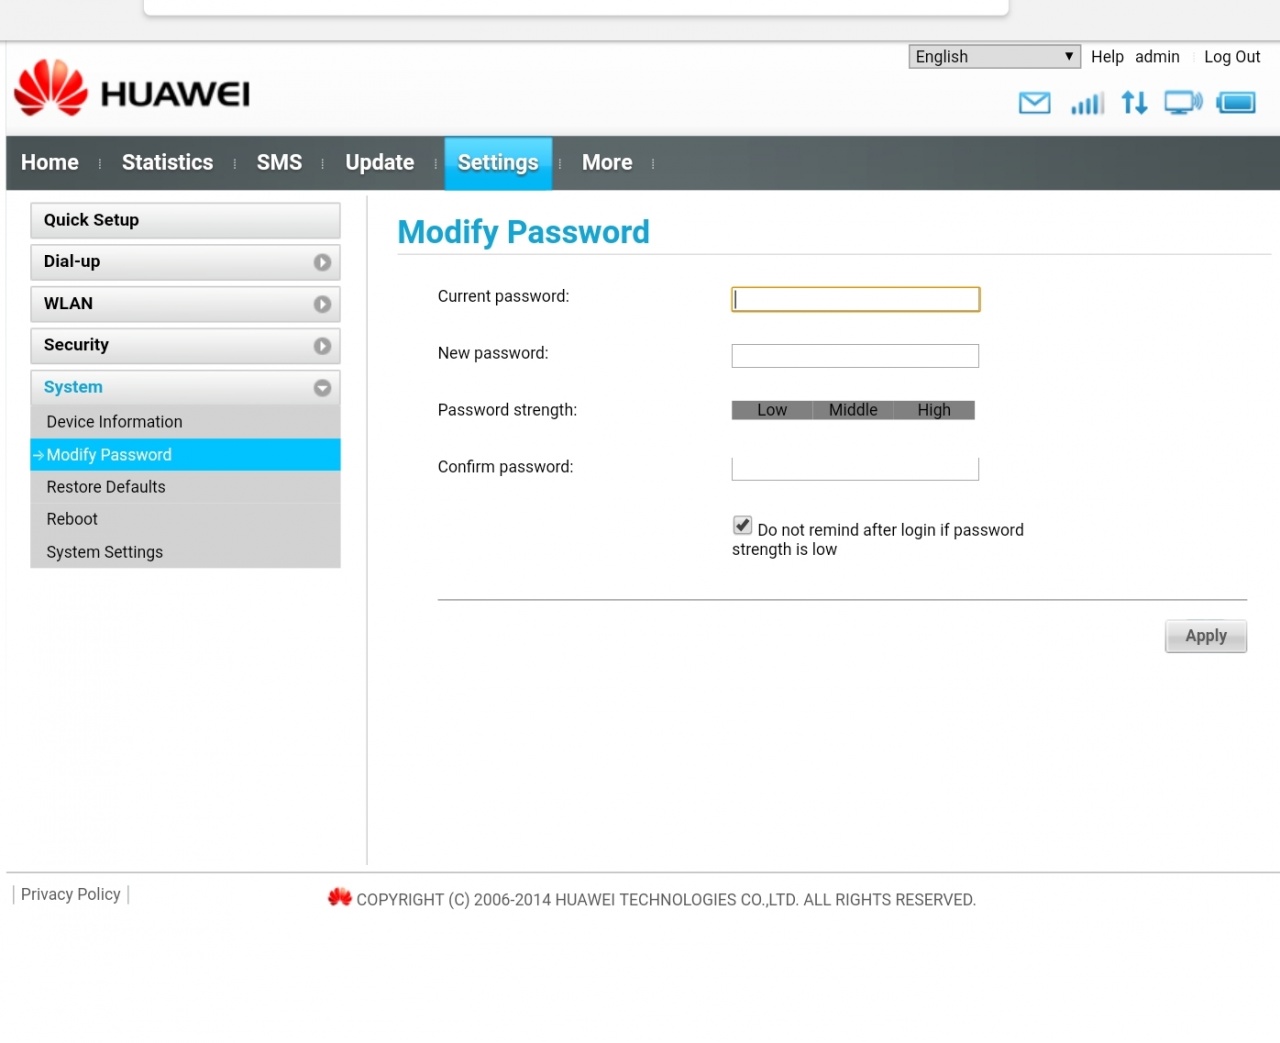
- Click ‘Settings’ –> ‘System’ –> ‘Modify Password’ and change the password to something else. MiFi will restart
- Login with the new password
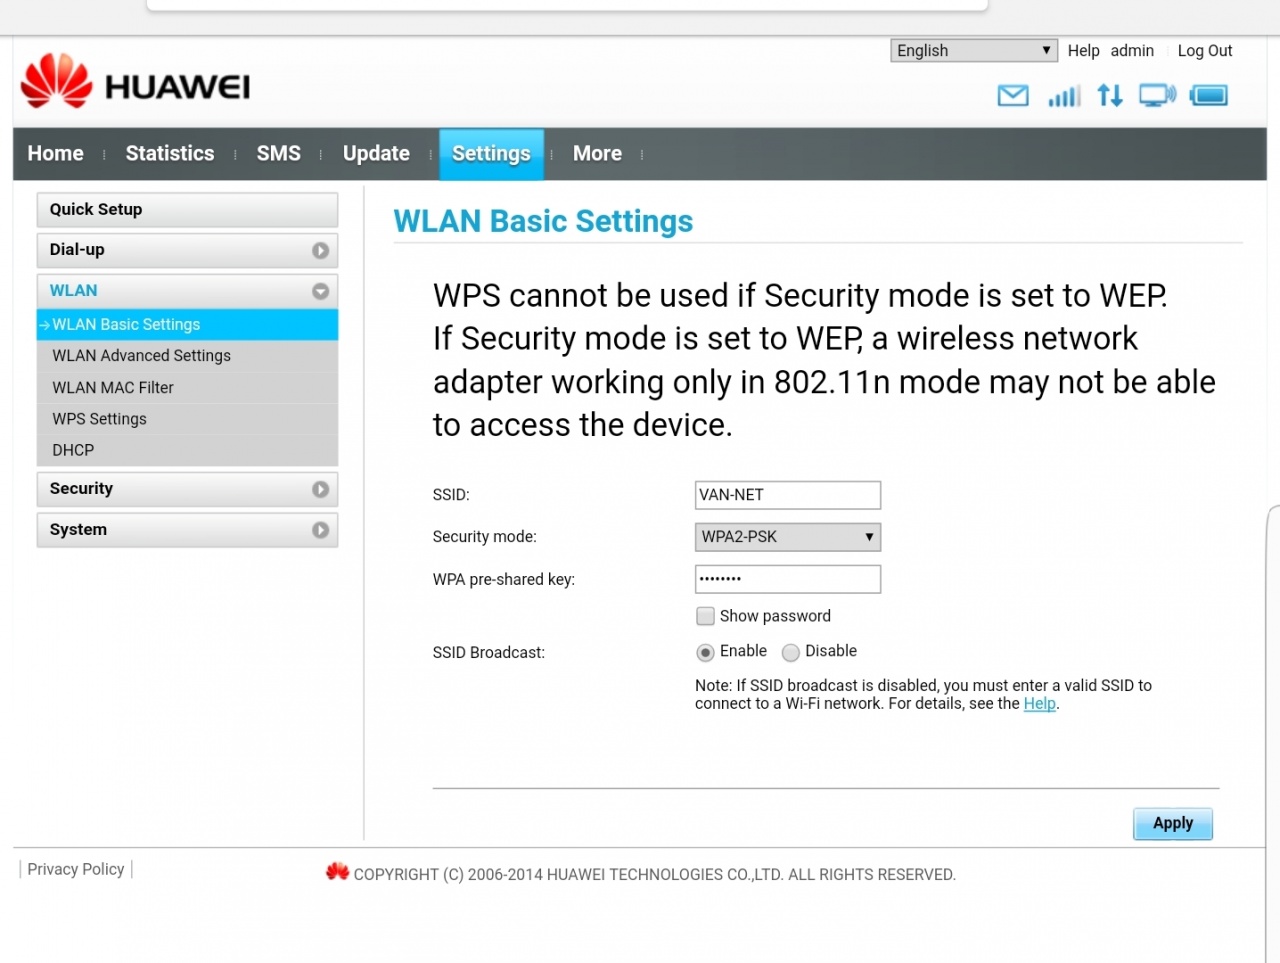
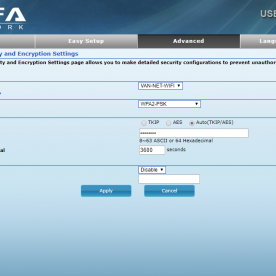
- Click ‘WLAN’ –> ‘WLAN Basic Settings’ change the SSID to ‘VAN-NET’
- Select WPA2-PSK, and enter a pass phrase. Click Apply. MiFi will restart
- Connect to the new wireless network you setup in steps 7 and 8 and login to the MiFi again
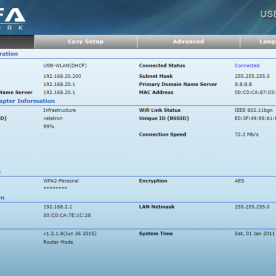
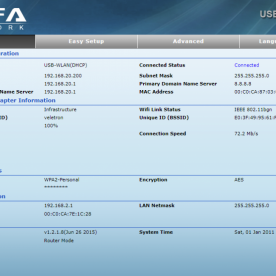
- Click ‘Home’ – does the MiFi already show ‘connected’ ? [You are done!]
- If not then you need to manually configure the Mobile Network
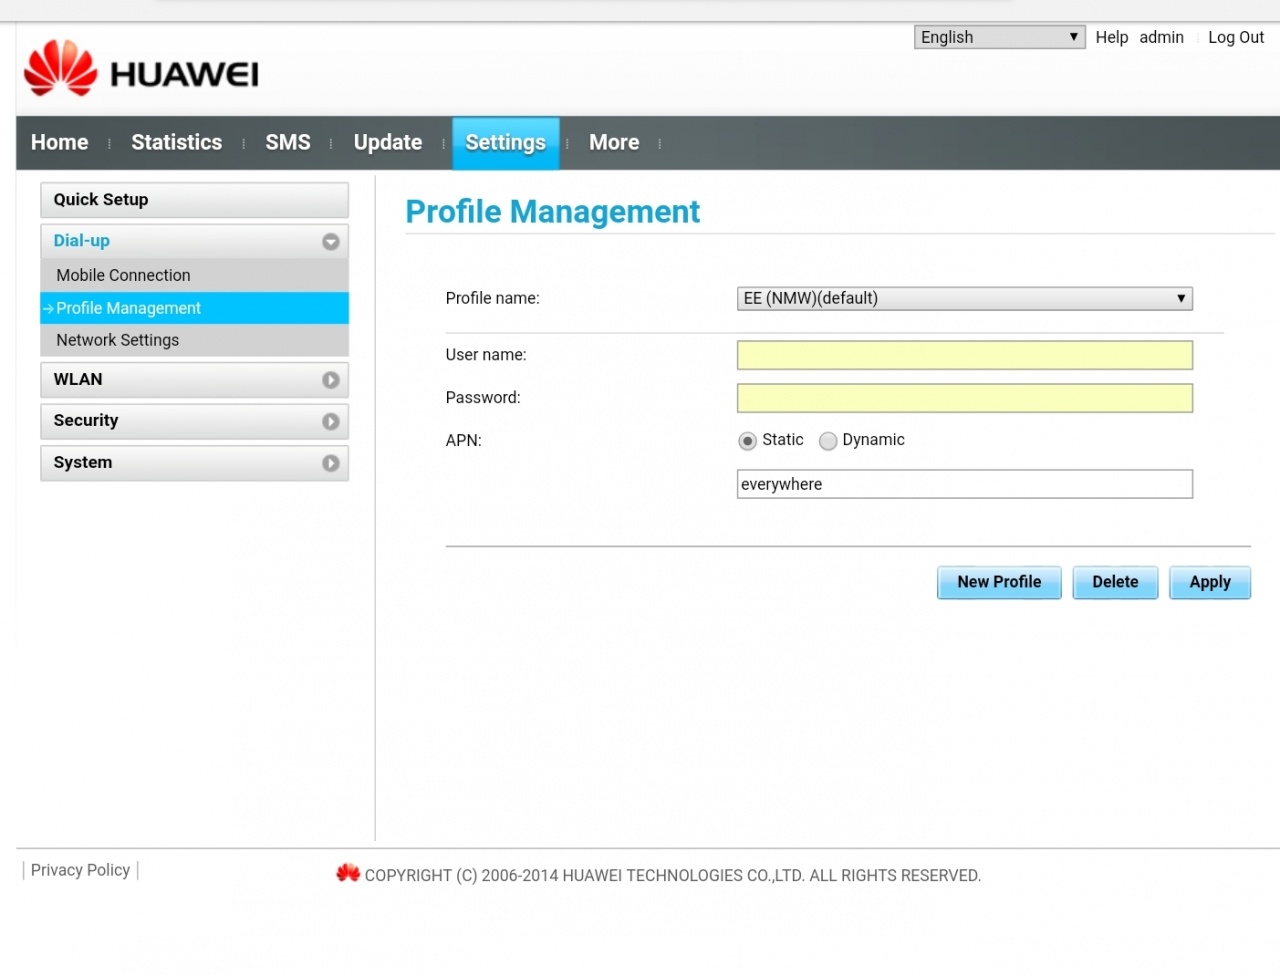
- Click ‘Dialup’ –> ‘Profile Management’ In the ‘Profile Name’ is your network listed? If So Select it and click Apply [You Are Done!]
- If not listed, or if still does not show ‘Connected’, click ‘New Profile’
- Name your Profile eg ‘My EE Setup’
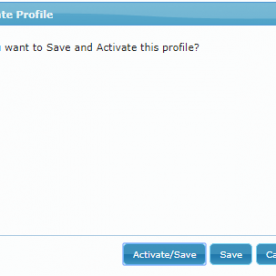
- For ‘EE’, Select ‘static’ button and set APN to ‘everywhere’ (no quotes) Click ‘Save’. Example
- For ‘Three’ Select ‘static’ button and set APN to ‘three.co.uk’ (no quotes) Click ‘Save’.
- Ensure the new profile is selected and click ‘Apply’
- Click ‘Home’ Verify that MiFi reports ‘Connected’
- In case it still does not work, check SIM card properly inserted
Tips
I have found that the Huawei MiFi will prefer a 5-bar 2G signal over a 1-bar 3G signal, and a 5-bar 3G signal over a 1-bar 4G signal. Now we all know that 2G is basically useless, and that a single bar of 3G will be a thousand times faster than 5-bars of 2G!
Thankfully we can fix this in the MiFi settings by forcing the unit into 3G or 4G mode as opposed to the default ‘auto’. Just be sure to reset it to ‘Auto’ afterwards otherwise when you relocate, it wont be able to find the 4G signal because its stuck in 3G-only mode. Unfortunately, Huawei devices do not offer an ‘auto’ mode for just 3G/4G. Click ‘Dialup’ –> ‘Network Settings’ and change ‘Preferred Mode’ to ‘3G Only’ or ‘4G Only’ See Screenshot
Settings on the Huawei are made by connecting to its web interface, or using the Huawei HiLink app (Android).
Motorhome Internet via WiFi Repeater (Booster)
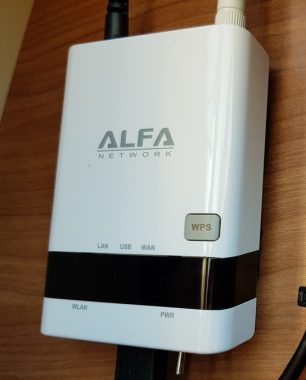
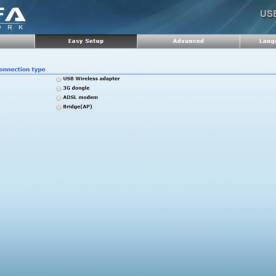
The second most useful device in my internet arsenal is an Alfa R36 which I use together with an Alfa TubeU-V. These two devices connect together via USB and operate as a WiFi Repeater. As with the MiFi, an external antenna is absolutely essential to performance. My external WiFi antenna sits permanently on the same pole on the rear of the van as the 4G antenna.
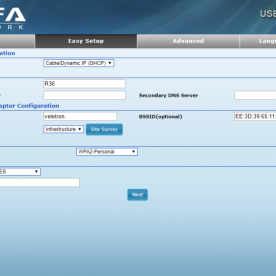
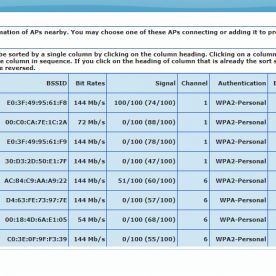
Inside the van its simply a case of turning on the R36, connecting a phone/tablet/laptop to the WiFi Network (in my case VAN-NET – V.A.N = Van Area Network 😉 and running a network survey. The network survey responds with a list of available access points, and from this list you have to choose one that A) you have access to and B) has a decent signal strength.
Much of the time I am using the ‘FON WiFi Network‘ – A world-wide WiFi network that operates on the ‘you share, we share‘ model. Previously, it was possible to buy a FON router for your existing home broadband provider. These days you need to be with BT Internet (opted in to FON), or you can download their App for pay-as-you-go access: Android | Apple.
The R36 will also connect to a campsite WiFi signal, MacDonalds WiFi or WiFi within a pub you are parked up outside of! Whatever network you are connected to externally, its just VAN-NET inside the van.
Initially, the R36 requires a fair amount of configuration (detailed below) – but this is once-only.
Getting the WiFi transmitter close to the actual antenna is key for good WiFi repeater performance. This is exactly what the TubeU-V/TubeU-N allows as it fits externally, screwing directly to the N-Type connector on the antenna, and connecting to the Alfa R36 via USB. Sometimes, this is not possible (eg on antenna’s that has SMA flyleads rather than an N-Type), so it is necessary to use an Alfa AWUS036NHR instead of the Alfa TubeU-V.
Shopping List
- Alfa R36 – Amazon £54
- Alfa TubeU-V or Alfa TubeU-N – Amazon £27 & 2M USB Extension Cable – Amazon £5.49
- Alfa AWUS036NHR – Amazon £23.75
- With the above, you may require antenna cable N-Type – RP-SMA Amazon £4.81
- Some Blu-tak (easy way to seal the cable entry on the Alfa Tube-U)
- Inline power switch Amazon £5.21 (the Alfa R36 has no power switch)
- Fuse 3A either Inline or Fixed – For 4G + WiFi solution the fixed auxiliary fusebox is neater.
Omni-Directional (360°) Antenna Selection
- Option 1: 9dBi Omni Solwise £23.10 (570mm Tall)
- Option 2: 9dbi Omni (Import) Amazon £46.07 (520mm Tall)
- Option 3: 8dBi Omni Solwise £21.52 (485mm Tall)
- Option 4: Same as option-1 for 3G/4G, this antenna performs reasonably for WiFi Amazon | Solwise £71 ea
- Option 5: Marine WiFi Antenna Amazon £32.99 (quite fat!)
- Option 6: Combined Alfa TubeU-N and Antenna Kit With Suction Mount Amazon £45.95 | Suction Mount £5.59 (Temp mount only!)
- Option 7: PUK Antenna 4G+WiFi: Solwise-3 | Aquamare (£210-£222) | Wifi Only: Solwise £140
- Option 8: KuWifi Suction Mount Antenna (connects direct to R36) Amazon £21.19 | Needs modded suction mount above (Temp mount only)
NB: Options 1-3 are too tall for permanent fixing on the van’s roof. Maybe you can get them on a telescopic pole fitted to the rear that can be lowered for travel, otherwise they should only be mounted while stationary.
Directional Antenna’s
- Option 1 – Alfa USB Panel Antenna UBDo-UV This connects directly to the R36 via USB – £50
- Option 2 – Solwise USB Panel Antenna Amazon This connects directly to the R36 via USB – £47
- Option 3 – 10dBi Panel Antenna Solwise £24
- Option 4 – TP-Link Panel Antenna Amazon (For use with AWUS036NHR) £15
I personally use an Omni-Directional Antenna (not listed above as no longer available). I usually wild-camp and generally have no idea from which direction the signal is coming. For me, the convenience of not having to setup/point an antenna outweighs the benefits that a directional antenna can give. In my experience, and based on the fact that the antenna at the other end is usually NOT directional, I find that a directional antenna gives maybe a 10-20% boost in signal strength vs the better OMNI antennas. This might, of course be the difference between getting a reliable signal or not! Directional antenna’s will always be of more use to folks who use campsites and have a good idea which direction to point it – eg the facilities block or site reception. Directional systems are also less suited to permanent installation so this might be your deciding factor.
NB: My ordering of the above based on how I believe they will perform (from experience of similar antennas). Best to worst in each section (omni and directional).
Options
Permanent Mount
- [5] On-Roof Install: Alfa R36 £54 | AWUS036NHR £24 | Power Switch £5 | Velcro Mounting Pads £2.54 | Antenna Cable £5 | Antenna £33 | Through Roof Gland £12 Total: £135
- [6] On-Pole Install: Alfa R36 £54 | Tube-U £27 | USB Cable £5 | Power Switch £5 | Velcro Mounting Pads £2.54 | Antenna £22 | Pole Clips £11 | Mast £9 Total: £135
NB: The taller antenna’s (options 1-3) are not suited to permanent on-roof installation! My ‘Option 4‘ Omni antenna (although designed for 4G), performs well on WiFi and could replace either antenna above.
Temporary Mount
- [7] Budget Omni-directional: Alfa R36 £54 | Power Switch £5 | Velcro Mounting Pads £2.54 | Antenna £21 | Suction Pad (needs slight mod) £5 Total: £89
- [8] Ultimate Omni-directional: Alfa R36 £54 | Tube-U £27 | USB Cable £5 | Power Switch £5 | Velcro Mounting Pads £2.54 | Antenna £21 | Suction Pad £5 Total: £120
- [9] Budget Directional: Alfa R36 £54 | AWUS036NHR £24 | Power Switch £5 | Velcro Mounting Pads £2.54 | Antenna £15 Total: £100
- [10] Ultimate Directional: Alfa R36 £54 | Power Switch £5 | Velcro Mounting Pads £2.54 | Antenna £50 Total: £111
For mounting a directional antenna, I would suggest a suction cup designed for an Action Camera such as those on this page. You’ll need to employ your own brain cells here as its not something I use personally.
Wiring It Up
Usefully, the Alfa R36 runs directly from 12V, and even at alternator voltages I have had no issues with mine (which is now 8 years old!). If you have soldering skills, you can install a switch in the R36 as I did, otherwise, use the inline switch shown in the parts list above. The R36 should come with a mains adaptor, cut the cable off this at the wall-plug end. This will then connect to your inline switch with the other end connecting to the R36. All you need to do now is fit an inline fuse (2A) and get 12V power to the R36. Before you connect the power, ensure that the +ve is on the centre pin of the barrel connector and the -ve is on the outside of the barrel connector – get it wrong and you’ll need a new R36!
If you chose an Alfa TubeU then this fits onto the antenna externally, and connects via to the R36 via USB. If you chose an Alfa AWUS036NHR, then this must be fitted internally, and the antenna cable kept short, it also connects to the R36 via USB. The USB cables in both cases can be up to about 3M Max. The Antenna or USB cable may be easily routed through the seal of the back door on a PVC, through a window for a temporary install, or via a drilled hole and sealed cable gland for a permanent install on either a PVC or Coachbuilt. Suitable cable glands may be found here: Single Gland | Double Gland.
Initial Setup (Once Only!)
This is the ‘run once’ setup that you will need to do on your R36 when you receive it:
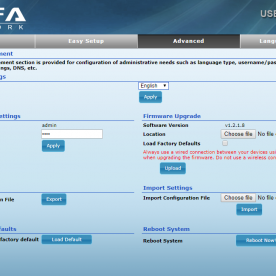
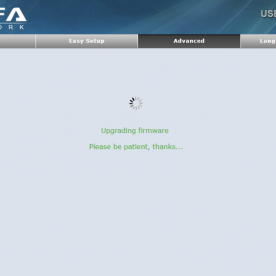
- First job is to update the R36’s firmware. Click Here enter ‘R36’ as the search Keyword, enter the code and click ‘Download’
- The newest firmware should be shown at the top. At the time of writing V2.32 – Download this – remember where you placed it!
- Connect the R36 to the Alfa TubeU or AWUS036NHR. Attach your antennas (don’t forget the one on the R36 its self!)
- Connect power to the R36, and switch it on. R36 will take 60 seconds to boot – You should see some flashing lights on the R36 and TubeU/AWUS036NHR
- Turn OFF your PC’s WiFi and connect the PC to the LAN Port on the R36 using an Ethernet cable.
- On the PC, browse to http://192.168.2.1 – Do you see an ALFA Login prompt?
- If not, ensure that the PC’s Ethernet connection is set to DHCP See Here. Browse to http://192.168.2.1 again – Do you see the login page now?
- Login as user ‘admin’ with password ‘admin’
- Proceed as per the pics below

Connecting to a new Network
So, you’ve arrived at a campsite, you know they have WiFi, but you phone/tablet cannot see the network as you are camped too far away. Time to make use of your WiFi Repeater!
- Connect any external antenna’s. If you used a directional antenna, be sure to point it the right way.
- Power on your R36, and after 60 seconds, connect to its WiFi eg VAN-NET from your phone/tablet/laptop
- Browse to http://192.168.2.1 and login as user ‘admin’ with your password. Tip: bookmark it, and have your browser store the login.
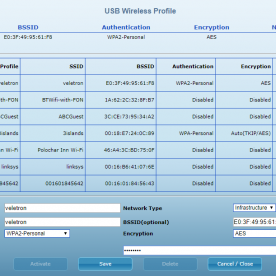
- Proceed as per the images below

Tips:
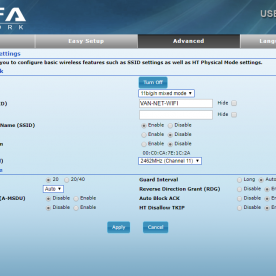
- Make sure that the R36’s ‘VAN-NET’ WiFi channel is different (as far apart as possible) from the Distant WiFi Channel –> See the channel in ‘site survey’, change it on the R36 under ‘Advanced –>Wireless Settings –> Basic’.
- You can re-order the scanned WiFi networks by signal strength – Click in the ‘Signal’ column Its the bit in the brackets eg (59/100), max is 100.
- Due to the chipset in the R36, and the USB connection, the max speed that can be hoped for is about 15Mbits still likely faster than the network you are connected to.
Antenna Mounting Options
Getting the best from your motorhome internet system requires the fitting of external antenna(s). How you mount your antenna(s) will depend hugely on your van, and on whether you want them permanently fitted or not.
Panel Van Conversions
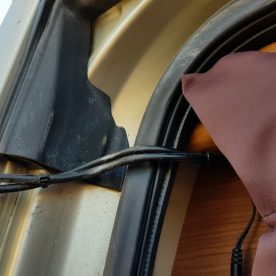
Mounting the antenna’s permanently without drilling holes is pretty easy on a PVC. In the current van and the previous van, my antenna cables simply passed through the door seals on the back nearside door (the one that gets opened less) I have had no leaks, draughts or issues with the cables doing this. I would recommend you take the same approach.


I used the following kit to mount my antenna’s
- Maxview Brackets Amazon £10.99
- Some clear outdoor mastic sealant
- Vision Plus Telescopic Mast Amazon £28.99
- Instead of the above (which I used to be able to get the antenna a ft higher) something like this for £8.99 sawn off would work
I bent the long side of one of the maxview brackets such that it hooked over the top of the door (see pics), this is a tight fit, I used some Sikaflex to make it stay put. The lower side of the upper bracket as well as the entire lower brackets uses the maxview double-sized sticky pads. These were then sealed with the clear mastic.
To form the bend in the upper bracket (to hook over the door) use some mole grips, and a bit of scrap metal/board – or even a rigid table mat or chopping board. Once it is on the door, use the mole grips to refine the fit further. Prior to permanent fitting you’ll need to sand and paint it as bending it will have cracked the paint. I made mine the same colour as the van and painted the plastic pole clips too.
Be sure to put a loop in the USB/Antenna cable as it enters the van to stop water running into the van via the cable – or just mount the R36 high up so the cable is going uphill through the door.
Coachbuilts/A-Classes
For temporary installations, you are best going with one of the suckered antenna’s shown above, or, if your van has a garage, an external pole with the antenna’s on top.
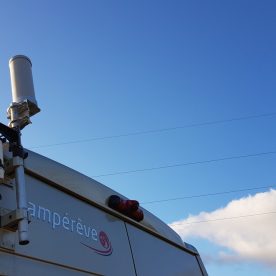
For a permanent install. I would Sikaflex some Alu ‘L’ brackets to the roof with a ~40cm gap in the middle, and a 5cm height. A plate 10cm wide fits across the brackets. Onto this, I would fit 3-off ‘Option-1‘ Antenna’s (From the MiFi Section) £71ea. The middle one would be WiFi and the 2 either side for 3G/4G. ‘Option 1’ is an antenna that screws to its bracket from below. The supplied bracket would not be used, the antenna’s would simply be screwed to the Alu plate, the N-Type connector passing through a hole in the plate. The antenna’s I am suggesting is the fatter one in the pic at the head of this article. The cables would have to come through a roof-mounted cable gland Single Gland | Double Gland. If this is too much to spend, try 2-off ‘Option 3‘ (From MiFi section) @ £22ea, and one off ‘Option-5‘ (from the WiFi Repeater section) @ £33. ‘Option-3’ bolts to your Alu plate while ‘Option-5’ could be sikaflexed in place. (bear in mind ‘option-5’ antennas are some 15cm in diameter).
If your van has a rear ladder, or cycle carrier then this could work as a mounting location for a telescopic pole this could be lowered for travel, removing wind-load from the antenna’s and thus enabling the use of the longer WiFi antenna’s, and the benefits they will bring.
If this is too much work, then a less-effective solution would be one of the PUK antenna’s, or simply hand Motorhome WiFi some money for their through-roof antenna.
Sundries
- Solwise has a number of antenna mounting solutions on its sundries page For instance. item ‘MNT-CAR-14C’ allows for the suction cup mounting of the Omnidirectional antenna in ‘Option 3‘ in the WiFi Repeater section.
- Motorhome wifi also sells accessories – the mount for the PUK antenna would be particularly useful on a PVC for instance.
Motorhome Internet via Joint MiFi and WiFi Repeater Installation
If you want to go the whole hog and install both options then from my ‘options’ sections for each, I would choose:
- Budget Roof Mount: Option [1] + Option [5] – two dome antenna’s mounted through roof or on Alu plate. £299
- Ultimate Roof Mount: Option [3] + Option [5] – two mobile antennas with the Dome WiFi antenna in the centre mounted through roof or on Alu plate. £409
NB: In the case of the latter, you could also replace the dome and use 3x this antenna instead (2 for the MiFi and one for the WiFi repeater)
- Budget Pole Mount: Option [2] + Option [6] £295
- Ultimate Pole Mount: Option [4] + Option [6] £417
NB: You might need two poles (one on each door perhaps). Its up to you to ensure that anything for fit to your vehicle is safe at road-speeds!
This is great info and I’m using it as the basis for a connection in a remote cottage (which you paddled past in your most recent outing to Ardnamurchan 🙂 ). I’m comfortable with the router and all ‘internals’ but have little or no experience of external antennas. If you weren’t going for a van/motorhome solution would you go for a bigger antenna – which you clearly know something about – or what you recommend here? Or perhaps what you recommend here on a damn great pole? We get a distinctly flaky 3G/4G signal on iPhones and need something more robust for internet access.
Happy paddling … my Apache is on order for some Sunart adventures of my own 😉
Thank you … David
As an Android user, I frequently have a signal where my mates with iPhones don’t on the same network! The MiFi will, indeed fix that, the one in the van can show 2 bars of 4G while my phone can’t see anything (both EE). There was good 4G at my parking spot beyond Salen. For a fixed install, where the location of the mast is known (or can be discovered by rotating the antenna), I would go for a directional antenna on a pole.
There are many options for this, but remember that for most 4G routers you will have 2 separate antenna connectors, which means either an antenna with 2 cables or 2 antenna’s. I think I would go for something like this in your instance: https://amzn.to/2zNs1WS . If you were further away then you would need to increase gain still further, perhaps using a dual enclosed yagi type (mounted horizontally) eg: https://amzn.to/2L0xX3Q or https://amzn.to/2LmJpTn (latter likely cross polarised, one antenna mounted with elements vertical, the other horizontal)
For a fixed install with mains power, I would also use a different modem, that is future-proofed (eg supports Cat6 LTE). These have a few advantages vs a MiFi namely:
– No Lithium Ion Battery permanently on charge
– Ethernet sockets on the rear
– Ability to add, for instance webcam or security cam – if you hire out your property then a webcam eg of Loch Sunart can be a good way of driving traffic and customers at it. I do that for our clubs’ cottage using http://www.benmorewebcam.co.uk
– Ability to place it close to antenna (to keep antenna cables short), and extend the WiFi reach using a separate WiFi access point elsewhere in the property connected via ethernet.
The most cost effective is likely the Huawei B525: https://amzn.to/2mtgzpX or the newer 618: https://amzn.to/2L3i8JN Its also possible to buy units from the 4G router store, that support dual sim cards and are able to aggregate bandwidth.
I’ve plumped for an Archer MR200 from TP-Link as I’m familiar with their products and have been happy with others I’ve bought previously. I’m writing this from Loch Sunart where the router balanced on the (closed) windowsill is getting a 50% signal with 3G or 4G depending upon the weather.
I think the signal comes from Tobermory which is almost ‘line of sight’ except for trees and rhododendron. I’ll investigate the aerials you suggest … I’m interested that you suggest directional, as most reviews I’ve seen push the omnidirectional aerials.
I’m use one of the Ethernet sockets to rig up a Pi-Hole adblocker which accounts for up to 15% of the web traffic to eke out a bit more usage from the SIM data allowance.
Cheers
David
Great article!! Does the R36 have to be configured by a LAN cable to laptop?? I only have access to a MacBook and it obviously doesn’t have a LAN port 🙁 I wonder if the R36’s defaults to “USB Wireless Adaptor” on 196.168.2.1 out of the box and could be configured by WiFi connection from the Mac?
The R36 sets up an AP under a default name, so it could be configured using this. This will be on the same subnet (eg accessed via 192.168.2.1). I can’t remember the default SSID/Password – it will be stated in the documentation – or sticker on underside of device. I purely stated using the Ethernet connection for config as it will still work if someone gets the wireless config wrong – eg it’s not as easy to lock yourself out. That said, in the event of a config error, simply factory-resetting the device will also restore connectivity via WiFi.
sounds like you know what your doing but as I like many ordinary folk all this is totally beyond mere mortals like me, however i did enjoy reading it.
im sure you could do well out of setting up a business and fitting these set ups for people.
I look forward to your next post.